
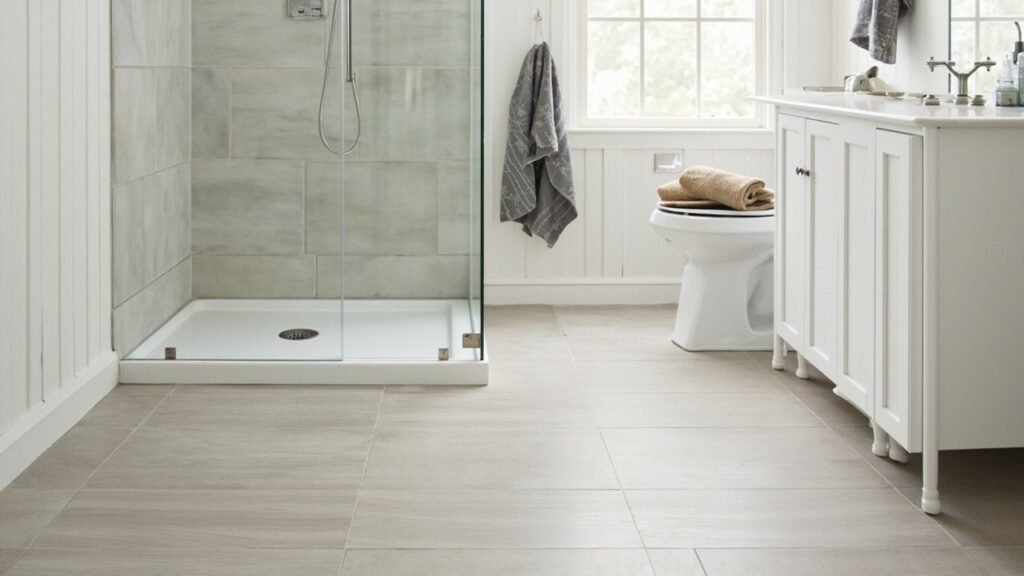
You’ve seen the photos: one continuous tile floor, no step into the shower, glass that seems to float. Then you look at your own bathroom, maybe in a 1920s Colonial in Newton or a two-family in Brookline, and wonder if that look is even possible there. Often it is. But a curbless shower isn’t just a tile choice. It’s a structural and waterproofing decision, and in older New England houses it depends on what’s under the floor more than what goes on top of it.
This guide covers the decisions that actually decide whether a curbless shower works: framing, drains, slope, waterproofing, and glass. It also gives you the questions to ask before anyone starts demolition.
Why a Curbless Shower Is Harder Than It Looks
A standard shower keeps water in with a curb, a raised lip a few inches high. Take the curb away and two things still have to be true. The shower floor has to slope toward the drain, and the bathroom floor outside the shower has to stay flat and dry.
You can only get both if the shower area sits lower than the rest of the room. The mortar bed or foam tray that creates the slope needs a certain thickness at its high edge. With no curb, that edge has to line up with the bathroom floor. So the base of the shower has to start below the surrounding subfloor.
In new construction, builders plan for that from the start. In an older house, you create that drop by working with the framing you already have.
What’s Under the Floor Decides Everything
Joist direction and size
The first thing a good remodeler checks is which way the floor joists run and how deep they are. Many older Greater Boston homes have full-dimension lumber that’s bigger than modern boards. Some have joists that were notched long ago for plumbing, or that sag under an old cast-iron tub. You can’t tell any of this from the bathroom side. Someone has to open the floor, or look from the basement or the ceiling below.
The common ways to recess the shower area
- Dropping the subfloor between joists: The old subfloor is cut out in the shower zone, and new blocking or ledgers are set lower between the joists to carry a new, lower subfloor. This works well when the joists are deep enough and run the right way.
- Reinforcing, then lowering: When joists are marginal, they can be sistered (a new board fastened alongside the old one) before the subfloor goes down. That restores strength that recessing might otherwise take away.
- Raising the rest of the room: If the framing can’t be lowered, the rest of the bathroom floor can sometimes be built up to meet the shower. That works, but it creates a step at the bathroom door. Many homeowners are trying to avoid exactly that.
What you should never see is joists cut deep or notched heavily just to make room for a drain. A structural shortcut like that shows up later as a bouncy floor, cracked grout, or a ceiling crack in the room below. It’s the hardest kind of mistake to fix once the tile is down.
Older-home surprises to plan for
Houses in towns like Lexington, Arlington and Belmont often have a few layers of history under the bathroom floor. You may find an old mortar bed several inches thick, cast-iron drain lines, patched subfloor from earlier remodels, or plaster ceilings below that crack if the floor above is worked on hard. None of these is a deal-breaker. They just mean the plan should include time and a strategy for what might turn up once the floor is open.
Drains and Slope: Linear or Center?
Center drains
A traditional square drain in the middle of the shower needs the floor to slope in from all four sides. That creates a shallow funnel shape, and the tile has to be cut along diagonal lines toward the drain. It works fine, but it limits your tile. Large-format tiles don’t bend into a funnel, so center-drain floors usually use smaller tiles or mosaics.
Linear drains
A long, narrow trench drain lets the whole floor slope in one direction, like a gently tilted plane. It’s the most common choice for curbless showers for a few reasons:
- It can go against the back wall, across the entry, or anywhere in between.
- Large tiles can run continuously across the floor.
- A drain placed near the entry catches water before it reaches the bathroom floor.
Shower floors are generally sloped at about a quarter inch per foot toward the drain. That’s enough to move water without making the floor feel tilted underfoot. Your installer should confirm the exact slope and drain setup with the local inspector’s expectations.
The plumbing reality
Moving or replacing a shower drain means working on the drain line and trap below the floor. Joist direction matters here as well, since the trap needs room to sit without cutting framing it shouldn’t. In Massachusetts, plumbing work generally requires a permit pulled by a licensed plumber, followed by inspection. Framing changes may need a building permit too. Expect your town’s inspectors to look at the work before it gets covered up.
Waterproofing: The Whole Floor, Not Just the Shower
With a curb, the shower pan’s edges stop at the curb. Without one, water can reach well past where the shower “ends,” especially from kids, pets, or a showerhead aimed the wrong way. Grout and tile aren’t waterproof by themselves. Water that gets through them has to meet a continuous membrane underneath.
The approach experienced installers favor for curbless showers:
- Waterproof the entire bathroom floor, not just the shower area, with a sheet or liquid-applied membrane tied into the drain.
- Carry the membrane up the walls a few inches all around the room, and full height inside the shower.
- Seal every seam, corner, and penetration, including valve and showerhead openings and any niche.
- Flood test before tile. Plug the drain, fill the pan with water, and leave it long enough to confirm nothing drops or leaks. Some inspectors require this. It’s a good idea either way.
Behind the membrane, the walls in the wet zone should be a cement board or foam board rated for showers, not standard drywall. In older homes that also means dealing with plaster, uneven studs, and walls that are rarely plumb. Getting the substrate flat is what lets large tile lie flat.
Glass and Layout: Keeping Water Where It Belongs
A curbless shower depends more on layout than on a door to stay dry. A few guidelines:
- Size matters. The deeper the shower, the less spray reaches the room. Very shallow curbless showers are where most splash problems start.
- Showerhead placement: Aim the main head away from the open side. A handheld on a slide bar lets you control the spray.
- Fixed glass panel vs. door: Many curbless showers use a single fixed panel with an open entry. Doors that swing need clearance at floor level, since there’s no curb for a sweep to seal against.
- Tile choice: Pick a floor tile with good slip resistance when wet. The same tile running through the room looks seamless, but the shower portion has to be safe underfoot.
Checklist: Questions to Ask Before You Commit
- Which direction do the joists run under the shower, and how deep are they?
- How will you lower the shower area: drop between joists, sister, or raise the rest of the floor?
- Will any joists be cut or notched? If so, how will they be reinforced?
- Center drain or linear drain, and where will it sit?
- What waterproofing system are you using, and does it cover the whole floor?
- Will you flood test before tile goes down?
- Which permits will be pulled, and who pulls the plumbing permit?
- What happens if you find rot, old mortar beds, or damaged drain lines once the floor is open?
- How will you protect the ceiling below during demolition and framing work?
- What glass setup do you recommend for this shower’s size and showerhead location?
Is a Curbless Shower Right for Your Home?
For many households a curbless shower is about more than looks. A zero-threshold entry is much easier for anyone using a walker or wheelchair, recovering from surgery, or planning to stay in their home for decades. It’s also easier to clean, with no curb to scrub around.
The honest answer is that it depends on your framing. Some older bathrooms are straightforward candidates. Others need structural work, and a few are better served by a low-profile curb. A careful assessment before any tile is picked will tell you which one you have.
Bath Design Boston is a bathroom-only remodeler serving Greater Boston, including walk-in showers, tub-to-shower conversions, and custom tile. If you’re weighing a curbless shower, contact us for a free, no-obligation estimate.
Frequently Asked Questions
Can I get a curbless shower on a second floor?
Often, yes. It depends on joist depth, joist direction, and what’s below. Second-floor bathrooms in older homes usually need a close look at the framing and a plan to protect the ceiling underneath.
Will a curbless shower flood my bathroom floor?
Not if it’s designed and built correctly. Proper slope, a well-placed drain (often a linear drain near the entry), enough shower depth, and a waterproof membrane across the whole floor keep water contained.
Do I need a permit for a curbless shower in Massachusetts?
Generally, moving or replacing drain plumbing requires a plumbing permit pulled by a licensed plumber, and structural framing changes may require a building permit. Requirements vary by town, so check with your local building department or your contractor.
Can I use large-format tile in a curbless shower?
Yes, especially with a linear drain, which lets the floor slope in one plane. Large tiles need a very flat substrate and should have a slip-resistant finish.
Is a curbless shower a good aging-in-place choice?
It’s one of the most useful ones. Pair it with a handheld shower, a built-in bench, and blocking in the walls for future grab bars.